Take your hand and cover the top one third of today's image. Without that third of the image it doesn't really "tell" the complete story, right? Without seeing where the water comes from it's sort of blah. Looking at it you can't tell if it's a lot of a very small stream or a little of a bigger stream. Today's image "almost" qualifies as a monochrome print. It wouldn't take much to suck the blues out of the shot and leave only black, shades of grey and green. One of the other things you've probably noticed is that it's pretty dark. The light "shines" down through the center of the image, drawing the eye through the image. One of the big things to watch out for is closing down the top of a shot like this. The overall image has a typical very light vignette, except...! The vignette has been removed from the top of the shot. Even though the vignette is pretty subtle on the lower half of the image it was too much for the top half. All along the top of the top, everything was lost. The rocks on the left side, the center flow of water and the sunlight on the right were just black. The "halo" along the top of the rock in front of the pool is just that. I looked at it and thought it was something I did while bringing out the texture of the moss on the rock. Nope! It's actually the mist from the water falling into the pool. I checked the original image, the finished image and several steps along the way. It's there all the way through. To find out about how today's image was "brought to life", hit the "read more".
The first thing was to go back to an older technique (way back a year ago or so) to get the image to a very neutral color position. To find the blackest black, the whitest white and the dead center middle grey a Threshold Adjustment Layer was used along with the Color Sampler Tool (i - eye). Moving the slider to the left shows where the blackest black is. Once found (in today's case it was at about 8 in the range of 256 shades) a reference marker (from the Color Sampler Tool) was placed. The slider was then moved to the right until the entire canvas became white (about 231 of 256). A new Layer was added under the Threshold Adjustment layer and filled with 50% grey. The Blend Mode was changed to Difference. Going back to the Threshold Adj. Layer now shows that the curve is folded back on itself. That means middle grey is now the lowest number that can be seen.
After the black, white and center points are found they can be worked with. The next Adjustment Layer needed is Levels AL. I used to be an advocate of using a Curves Adjustment layer, but am now leaning more toward Levels. The reason is that the input and output levels can be controlled. Take the Black Pointer and find Color Sample Point #1. Click on it to set the black point. The White Pointer and set the white point (point #2) and then the center point using the Grey Pointer. Then go to the Output Levels. Forget about the slider. Set the points to 5 [to 8] (Black) and 245 [to 248] White. This insures there's detail in both the blacks and the whites. The values are so close to the ends of the scale that no one is going to take a look and say "Whoa, there's no true Blacks (or true Whites) in this image. Someone would have to have measuring instruments to prove there is no black or white.
Once the image was set, the Dodging and Burning could begin. A New Layer was added on top of all other Layers and filled with 50% grey. Using the Brush Tool (B) with the Brush Opacity set to 20 - 25% and the Foreground color set to White the areas needing brightening could be brought up and controlled to lead the eye through the image.
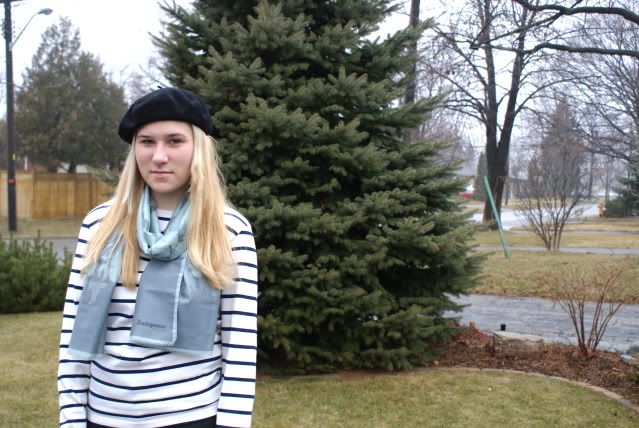
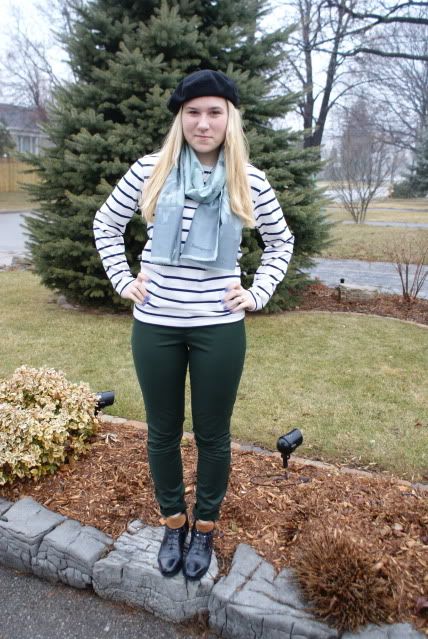
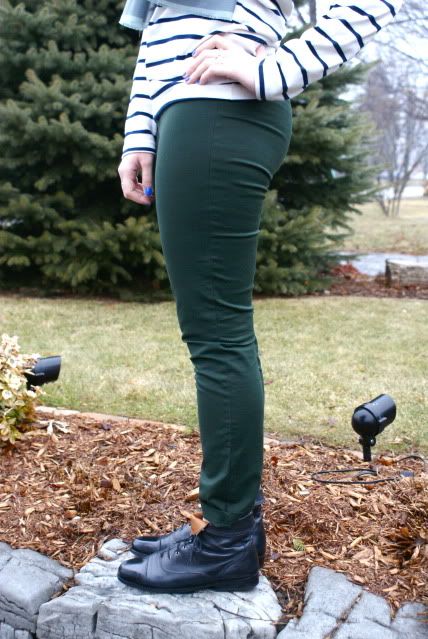
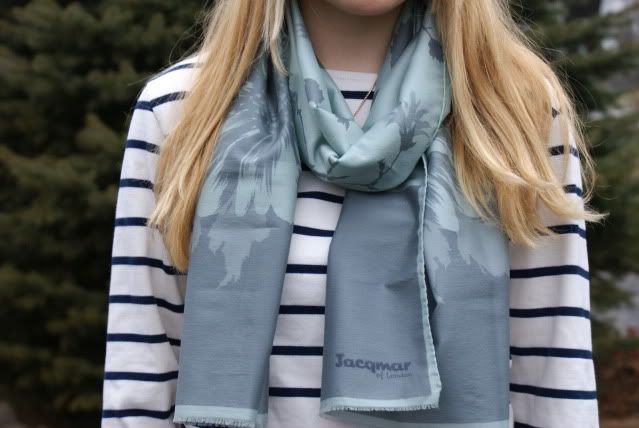
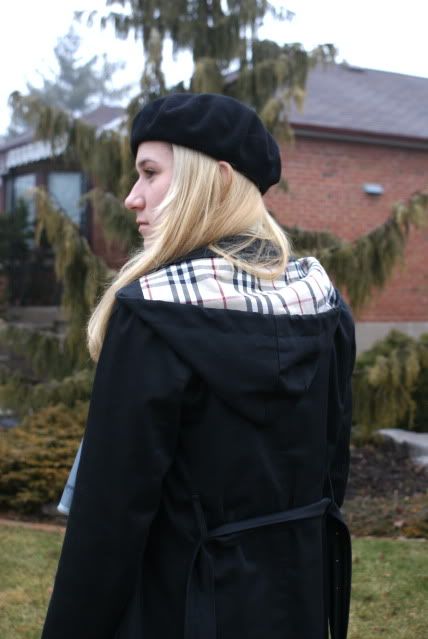
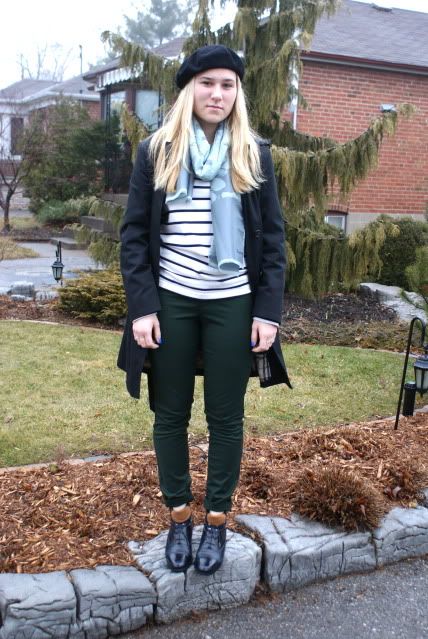
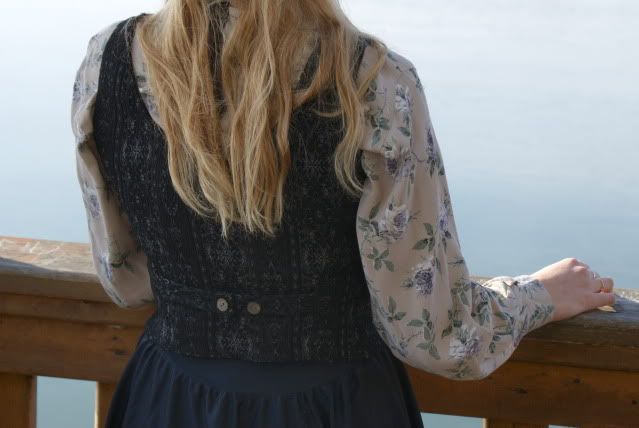
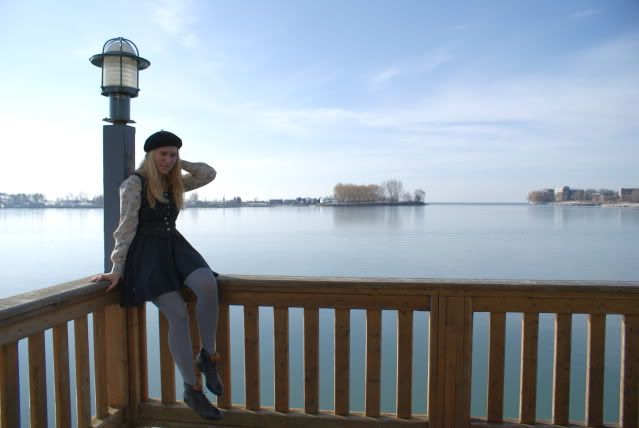
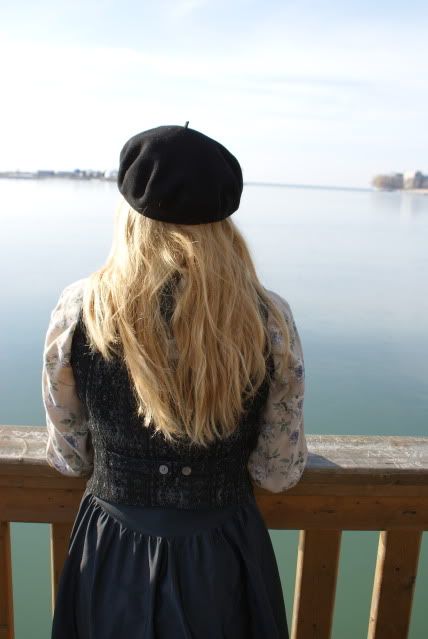
Today's image is all about moving the viewer's eye to the areas you want to emphasize and away from spots you want to downplay. It's about movement within an image.
Blog Archive
-
▼
2011
(181)
-
▼
March
(16)
- Spring Is Almost Here And Can Always Use A Little ...
- An Easy Way To Get A Pure White Background In Camera
- Using A "Dave Hill" Effect To Give A Grittier Look
- mother nature is cruel
- It Takes A Lot Of Lights To Make It Look Like You'...
- Using Adobe Photoshop To Apply Makeup
- Sometimes The Color Is Just There
- Updating An Image With New Tools In Adobe Photosho...
- ice water
- Using Adobe Photoshop To Add Really Subtle Details
- Content Aware Move The Guy Around The Corner
- Photoshop Even Makes A Bad Winter Look Better
- Photoshop Makes Time Travel Possible - Sort Of
- The Case For HDR Toning Over Merge To HDR Pro
- what time is it mr. wolf? time for a giveaway
- Adding Real Estate With Adobe Photoshop CS5
-
▼
March
(16)
An Easy Way To Get A Pure White Background In Camera
Well, this is quite a shift from the previous post. The March 25, 2011 post's picture is just about as dark as today's image is white. To get the darkness in the older post the "Dave Hill" style was employed to create a moody, serious cast to the shot. It would be tough to get lighter, airier than today's image. We have a white flower on a white background, and yet there's detail throughout the white. Click on the image to see an enlargement. Only two things were done to modify the image in any way. Hue/Saturation Adjustment Layers were used to bring up the green in the leaves and the wrap on the bottle's neck. To bring up the Green a Yellow Hue/Saturation Adjustment Layer was used. Sounds a little strange, but in an RGB (Red, Green, Blue) color space Yellow has a huge effect on greens. More so than trying to bring up a Green Hue/Saturation Adjustment Layer. The Gold was a little more iffy, so the little hand with the double arrows found to the left of the word Master was used to bring up the gold selectively. Kind of a "happy accident" happened to get the deep blue for the Stroke (Select All [CTRL A] Edit/Stroke)around the image. There was a serious blue fringe in a couple places. The edges of the green had a noticeable, thin blue halo in spots. Using the Magic Wand Tool (W) (almost never used) with Contiguous turned off picked up all the blue areas. The selection was enlarged by a couple of pixels (Select/Modify/Expand) and brought up onto a separate Layer (CTRL J). The result was, what looked like, some thin pencil lines of deep blue. A Hue/Saturation Adjustment Layer was used in a slightly different way (adjusted Hue rather than Saturation) to convert the blue lines to green lines matching the leaves. All that is fine and good, but to find out how the stark white background was done in the camera, hit the "read more".
The setup for today's image couldn't have been simpler. One light, one reflector. If we only have one light, how can we control any shadow from the one light? One method would be to go to checkout Lastolite's HiLite Illuminated White Background. They come in four sizes (?) and range in price from $275 for the 4.6' x 3.6' to $850 for the 7' x 8' size. Ouch! In either case. If you're going to do a lot of high key (as in make a career out of it) images it might be a good investment. If you shoot high key once in a blue moon as I do, maybe not.
My question was "do I have something similar I can use to get the same effect (or close to the same effect)? The easiest thing I could come up with is a softbox. In this case a softbox would be a far better choice than a shoot through umbrella. An umbrella would spill light around the room and contaminate the scene. A softbox would contain the light. I set up a 24" x 36" softbox with an SB 600 Nikon Speedlight defused as the source. Ckeck out Larry Becker's "Larry's Cheap Shots" for an easy way to hold the flash in the softbox or almost anything.Now, the key to the whole thing. Get your camera off auto anything. Not Auto Mode, not Aperture Priority, not Program Mode, not Shutter Priority, just plain Manual. The reason for this is that you're going to shoot directly into the softbox. That's right. In a line you'll have the softbox with the subject directly in front of it, with the camera directly in front of the subject. The reason you have to use Manual Mode is that the camera will go crazy trying to get a grey. Take some test shots and dial in the right exposure for the subject you want to shoot. How does 1/200 at F 11 sound? You do have to stay with the sync speed of your particular camera (in the case of a Nikon, typically 1/250 second or less) and adjust the F-stop to nail the exposure. Neat trick, but don't let the camera do the work in this case. Be smarter than the camera.
Labels:
technique
Using A "Dave Hill" Effect To Give A Grittier Look
I'm not going to beat a dead horse (too much), but wanted to take the shoot at the firehouse the other day up a notch. In yesterday's image, the firefighter looks good. A handsome fellow who looks like he could pose for GQ or some other men's fashion magazine. After looking at the shot I wanted to make these guys look like the rugged heroes they are. While we were at the firehouse I kept telling the men to give me a serious, "I'm fighting a fire" type of look. For the most part, it didn't happen. Because I wasn't the only one shooting I couldn't shoot fifty shots of each firefighter, changing poses ever so slightly to zero in on an expression that would give the feel of them "at work". That's okay, they were all good sports about putting up with us while we were there. I explained to some of the shooters not familiar with Nikon's Creative Lighting System how to set their cameras to work with the configuration I had programmed in to the camera and flashes. Only problem with that was that, at one point, every time I clicked the shutter, someone had fired a split second before me and had stolen my light. The back lights had it easy, so I'd get the light skimming across the sides of the persons face, but nothing for a fill. It cut down on the number of keepers for the evening. I took about ten shots of one particular fellow but everyone of them wound up with zero fill. Guess I'll have to do another shoot to fill in the blanks. Today's image has a "Dave Hill" type effect put on it. I knew Scott Kelby did a post about his riff on Dave Hill's work a couple years ago. A Google search turned up the post I was looking for. To give Scott the credit he's due and to find out how it was done, hit the "read more".
Scott Kelby did his post about doing a "Dave Hill" like effect back on March 6, 2008. You've seen the effect I'm sure. Just take a look at almost any still shot of any current US TV show and it probably has the cast standing around, arms folded, with the "Dave Hill" look. It's that popular.
The first thing to do is to take a perfectly good shot, with strong lighting, and make it look screwed up. Here's the settings in either Adobe Photoshop Lightroom or Adobe ACR (Adobe Camera Raw).Crank the Recovery slider up to 100%.
Crank the Fill Light slider to 100%.
Same with the Contrast slider - 100%.
Again with the Clarity slider - 100%.
Lastly, the Vibrance slider - 100%
Put the Brightness slider at about 50%
The Saturation slider down until all color is drained and then back up about 10 points.
Finally, bring the Blacks slider up to get the image to look somewhat reasonable.
Once you're there you're ready to start finishing the image. You can soften the skin using a Gaussian Blur. (I didn't use this step because I was looking for more grit.) You may have to go back and forth between the Tone Curve, Basic and Hue/Saturation adjustment in either Lightroom or ACR. Going between the three panels allows you to tweak things to dial in the image to your liking.
The last steps in LR or ACR are to put a fairly heavy vignette on the image. You can use the Post Crop Vignette Panel and play with the sliders to close in around the subject to increase the drama of the image.
Once you're at this point, take the image into Adobe Photoshop and make any adjustments necessary.
The "Dave Hill" effect is an interesting way to finish the right image. It's not for every image, but, if you have an image with strong lighting, give it a try.
Labels:
technique
mother nature is cruel
I was convinced that Spring had truly arrived in Toronto, so I put away all my boots and thick coat and this here outfit was my "hello Spring, glad to see you again" outfit. Well, mother nature was clearly playing tricks because last night we got A LOT of snow. So on top of finishing up papers, studying for exams, managing extra curricular responsibilities, I now have to deal with snow and cold weather. Really disappointing. :(
![](https://lh3.googleusercontent.com/blogger_img_proxy/AEn0k_vGBpMx9LLKT-3ZHNGg5-99qd5NKu84tY8TxZoMGBGHHYmEc2BNPIZ8UVHSQEs6K-HBY68QIhaod6Q559jMwu2xr7wUmJ4DCADIcw6YHEWCeVI5W3X6u9uGRQU4uTltZZZekQ=s0-d)
![](https://lh3.googleusercontent.com/blogger_img_proxy/AEn0k_s4aLZ6A_oWFRtUvYiDzV8UYfoEgpFis0HHA78xgG0oP7WepzRjhIPjArfhiGGisRorP2QbLsHMaIfPOPLKgmJ80hktbmAzW3x--QLLaEKh4AX8n8dO9pK72a-R2t9tdHOpTA=s0-d)
![](https://lh3.googleusercontent.com/blogger_img_proxy/AEn0k_twtrNQoSEhu549YTX2QtKQOCpcSwRjc0i44mxe_3Lvn-lRO_7RHA1qm8KQG7-ByIFvGljx8tYbGV41YoCMq-lwjE0TUoCO978feG5hhrPPjj3MN-ktLvVNZvWpcDQJwZyMBQ=s0-d)
![](https://lh3.googleusercontent.com/blogger_img_proxy/AEn0k_sc6LLnU8MTYDMMZYe6-V06XclQWyFKAEGcjlYd37vI2gnPgLnwzKwqohpD5xp7jpPzP4UaOuEhH-CIJcQm-WUYXSLgjljati0x782OCXass3qCandlcgY-Zc6Oe2AbDaCD=s0-d)
![](https://lh3.googleusercontent.com/blogger_img_proxy/AEn0k_uhWNKGqmQdCROOxq7zbWm2bzDHFdAoJNu-6lquO3Hg4yqDo47DE1dY9LkXo0Ozjhz36MaMps0YNxkv2Q3Vn4SSnXcu9fxcMU1-iJ6OcEXNsYQ-Vsp_XjEU9VQJF19RnNfeSg=s0-d)
![](https://lh3.googleusercontent.com/blogger_img_proxy/AEn0k_uLqZwhgSAg0pIQW-in8yjj3hyq_ONtIsETIF2pmUQUPLQceQvS-ZbuQta5FCnN8GPxLihi61pB5i1w0jMv0uCQ2AlISZaHvOVkrCVcWbUMwVGbQXfrmzHLQ-bkV_8sEPO_ng=s0-d)
![](https://lh3.googleusercontent.com/blogger_img_proxy/AEn0k_u9uZZ5V4y30zGU3ikBv7Ycf_3mpC-Dvw5CuqmoJLgU5hzRvfG_ou2D_piPhdLrxKrjEeSFFRU3l_Fb8tq287pefr0ligJBuOgi7ChX_rVGt8YnNbNynosjPz-RaVYWWpGhjw=s0-d)
Wearing Gap pants, Enzo Angiolini shoes, American Apparel jumper, vintage scarf, Holt Renfrew beret, and Burberry trench coat.
Anyways, before mother nature took such a stab at my spring happiness, I got a chance to wear these pants. I put off wearing them since February because I didn't want to have to tuck them into boots, but here they finally are. I only bought them because I figured it was ridiculous how very little pants I own and the sales lady gave me discount on top of a discount, and sometimes it's fun to change up the look.
Anyways, this has been a very quick post, and once I finish up my last paper (which is due in around 16 hours, I can update more frequently (yay!).
Labels:
daily life,
outfit,
spring,
university
It Takes A Lot Of Lights To Make It Look Like You're Not Using A Flash
Last night a group of friends were invited to a local firehouse to shoot pretty much whatever we wanted (the sleeping quarters were off limits). People wandered in and out of the station, shooting inside shots, outside shots, shots from outside looking in, shots inside looking out and just about anything in between. A young friend (I'm talking teenager here) told me at one point that he didn't like shooting with flash and preferred "available light". Well, I brought a couple bags full of small lights. I carry twelve pairs of lights and one set of three matched speedlites. I told my young friend that it took a pretty good amount of gear to make it look like you're not using flashes. Today's image is typical of using flashes to create a reasonably dramatic lighting situation. I spent most of the time at the station working with people who had Nikons but were unfamiliar with Nikon's CLS (Creative Lighting System). One friend was using a 50mm lens and kept getting ahead of the softbox used as the fill light. She's quite a good shooter and her work can be seen as covers on local magazines and the pictorial portion of articles, menus, advertising, etc. She's used to working with her Radio Poppers and just couldn't get with the limitation (the need for a sightline to the sensor) of CLS. She got some god shots, but also got pretty frustrated. The Canon shooters kept asking if their on camera flash would set off the lights in the setup. Some got a little confused when I said they'd have no effect on the lights in the setup. To learn how the lights were set to get today's image, hit the "read more".
Being a cheap SOB, the lights used were three Nikon SB 600 Speedlites. I have a theory that letting Nikon's CLS do the heavy lifting is the way to go. If I had an SB 800 or SB 900 and used 1/3 of their maximum power I can probably get the same light with a SB 600 firing at 2/3s or max power. What's lost is recycle time. If the SB 800/SB 900 allows fairly rapid shooting (one click per second), the SB 600 might be five to ten seconds. As long as you have a good line a patter to keep the subject engaged it's not too bad.
The camera setting were 1/125 sec @ F5.6 (I like to keep with full, natural F-stops) set at an ISO of 400 (one stop above the Nikon's normal 200). The lens was a Nikon 18-200 and, for a shot like today's image, racked out to 135mm or more. For face and hat only shots it was probably closer to 200mm. There wasn't any worry about camera shake having a shutter speed lower than the shooting length because the flashes are there to freeze the action.
Okay, we have the justification for the equipment. We have the camera settings. All we need now is where to put the lights. The idea was to get some drama and hold detail throughout the face. Two of the lights were setup with grids and placed at 45 degree angles behind the subject. I didn't want light splashing all over the place and wanted to keep any stray light out of the lens, so the grids were used. The fill light was a third SB 600, with a diffuser, through a 24" x 36" softbox. A buddy of mine, who sells photographic equipment didn't think a small flash could be used in that big a softbox. Oh well. The lights were set in a triangle and the softbox light turned up a stop to compensate for the diffusion.
The setup resulted in some shots I believe the fire fighters will be happy with. It's the least we, as photographers can do.
Labels:
technique
Using Adobe Photoshop To Apply Makeup
If you've ever been to Disney's Epcot Center in Florida you might recognize the Venetian mask in today's image. She and several others wonder around the Italian Pavilion, not talking, but interacting with the guests. The mask worn by the character is very smooth, very white and have zero detail. Every once in a while I shoot a wedding as a gift for relatives or friends and do some makeup on the bride if her makeup isn't up to photographic quality. Nothing obvious, I'm not going to give a bride garish purple lipstick if she was wearing a light pink shade, but made bring the color up just a tad so it is visible. If an eyebrow looks a little strange I might "reshape" it to be more pleasing. I consider this to be a part of the retouching process. I wouldn't hand a bride a shot showing her with a big old zit on her cheek, so why would I give her something where it looks like she forgot to put on her makeup? In today's image I obviously had to go quite a bit further than goosing the colors. There was no color to start with, so everything had to be added, the face sculpted and restraint used. To find out more about how her makeup was applied and her face shaped, hit the "read more".
First thing was to make some Masks. The face itself was selected using the Quick Selection Tool (W) and saved (Select/Save Selection). The lips were another Selection with a modification made using the Refine Edge (Select/Refine Edge) to Smooth and Feather the lip selection. The face Mask was used several times to restrict where other shading and coloring was applied.
Next was giving the face a general color. A Pastel Yellow Orange (from the standard Swatches Panel) was used to fill a New Layer above the original image. The face Mask was applied and the Blend Mode changed to Color. The Opacity was reduce in increments of 10 points (hold the Shift Key down while using either the mouse or Down Arrow Key to make the adjustment.
The next New Layer was filled with Light Magenta Red (again from the Swatches Panel) and the lips Mask applied. To soften the lips to a more natural appearance the Refine Edge in the Masks Panel was used to make the transition between face and lips seamless.
Another New Blank Layer was brought up and the Face Layer Mask loaded again (Select/Load Selection). Light Magenta (again from the Swatches Panel) was used with a big soft Brush (B) and the area under the eyes painted. The Blend Mode change to Color and the Opacity reduced. The big thing to remember in doing any sort of makeup in Adobe Photoshop is to use a gentle hand. Opacity provides a "fine adjustment" tool for bring the colors down. You actually want to start a little bold and dial it back using Opacity.
The area over the eyes came next. It's basically the same as the area under the eyes. The color used was a Light Violet (I really don't like the Raccoon eye look). Again, an over sized Brush (B) with a large feather was used here also. When doing this type of work you want to use just the "feathered" portion of the brush to apply the colors.
The final step (before sharpening and applying a Vignette) was to "sculpt" the face. A New Layer was put on the top of the stack and filled with 50% grey. A smaller brush, with a tighter feather, an Overlay Brush Blend Mode (found on the context aware tool bar at the top of the frame) and a very low Brush Opacity was used to provide the shading to define the face. Because the need was to produce darker shades, only a Black was used and the Brush Opacity adjusted to give lighter and darker areas. The area under the brow, the outline of the nose and the cleft under the nose were hit darker and the side of the face, the shadow side of the nose and the area under the cloak were more lightly touched.
There was a couple of miscellaneous things done. Above the cloak to the left of the scene was a green leaf that was a distraction. The Quick Selection Tool (W) was used to isolate the area and a simple swipe of the Clone Stamp Tool (S) covered the leaf with the background brown.
The Sharpening was straight forward, but the Vignette was a little different. It was a three step process. One Vignette was the area away the face. The second and third were Gradients to bring down the brightness of the ruffles lower in the image.
Labels:
technique
Sometimes The Color Is Just There
Sure, something's been done to this image, but the one thing that hasn't been done (outside of the camera) is juice the colors of the sunset. The sun had just disappeared over the horizon and the scene was under exposed, deepening the colors. The boat was brought back a little using a Screen Blend Mode and a Layer Mask of the boat. The foreground seagull was added and hit with a Photo Filter Adjustment Layer, but the sunset is what it is. The silhouetted birds in the background were there. The image was cropped into a panorama, leaving lots of room for the ship to sail into.
As far as I'm concerned, today's image is about as straight as it gets. If you have a question about anything that was done, either leave a comment or send me a note at mailto:tom@kayviewgallery.com .
That's it for today.
As far as I'm concerned, today's image is about as straight as it gets. If you have a question about anything that was done, either leave a comment or send me a note at mailto:tom@kayviewgallery.com .
That's it for today.
Labels:
general interest
Updating An Image With New Tools In Adobe Photoshop CS5
Everyone has old images that, when you look at them today, could benefit from Adobe Photoshop CS5's new tools. Today's image is one such case. The original image was made back in October 2002. The amount of work done to it at that time was extensive. The side of the bell tower facing the front entrance had, basically, no detail. Without some sort of detail the image wasn't worth printing. The front facade was rebuilt using copies of pieces of the side with detail. A Selection was made, copied, pasted to a new Layer, flipped horizontally, and fitted into place using Free Transform (Ctrl T). Since there was no one section that fit the facade, smaller pieces had to be "tacked" together to made a full board and batten. A stop sign down by the there the shot was taken had to be removed. Today, with CS5's Content Aware Fill that would be a ten second fix. Back in 2002, Photoshop 7, it was a lot of Clone Stamp (S) work, gently nudging shadow and light to make a believable grassy area. The sky, believe it or not, was as it appears in the original snap. There was work to do in CS5. To learn what was done with today's tools, hit the "read more".
First thing, I knew, was that I wanted the sky "as is". The plan was to bump a couple parts up with some HDR Toning (Image/Adjustments/HDR Toning). The church could use a little more definition, it could be straighten up a little to get rid of any keystoning and the colors of the foliage could be brightened a bit.
Before doing anything, an Alpha Channel Mask had to be make. This is to be able to insure any HDR effect could be taken out of the sky. If you're a frequent reader you've heard me say several times that I don't particularly like HDR'd skies. Since this would be the same image with two different techniques, you could almost make the Mask by throwing mud at the screen. Because of the lace like detail in the trees, CS5's Quick Selection Tool (W) wasn't a very good choice to select the sky. The fallback is to use Channels and Calculations (Image/Calculations) to create a quick, lacey Mask. This is an extremely easy way to make this sort of Mask, once you get over the initial fear of the Calculations dialog box.
Once the Alpha Channel Mask was made the image was duplicated (Image/Duplicate). The order of these two steps is somewhat important because you'll want the same mask available no matter which way you assemble the composite. Church over sky or sky over church.
On one duplicate the HDR Toning was applied. The battens of the bell tower walls were made more distinct, the details of the belfry openings were accentuated, and the colors of the leaves brightened. Naturally the sky was effected to a degree I found to be too rough. The Mask was applied and the sky became more natural.
The scene was sharpened using a High Pass Filter (Filters/Other/High Pass), but the change looked, literally, unreal. Skies don't need sharpening and, in this case, the leaves didn't need it either. The Mask was painted out where ever the leaves were in the sky. Areas over the church itself were painted out selectively.
As a last step, a vignette was applied using a Layer Mask with a hole knocked out of the center. The Blend Mode was changed to Multiply and the Opacity reduced to the point where the vignette was there, but not blatant.
Labels:
technique
ice water
March madness! I pulled my first ever university all-nighter on Sunday which meant that yesterday I was basically dying. A Monday with 6 hours of class after not sleeping is not a good combination. As the school year draws to a close I am overwhelmed by the amount of work and commitments that I have. Sometimes I like to imagine what life would be like if I didn't have to sleep. I'd get so much more done. Anyways, in a couple weeks all my essays will be done and then I will only have exams left, so I'll be able to spend more time blogging. :)
![](https://lh3.googleusercontent.com/blogger_img_proxy/AEn0k_soOnFnNVco0qeq6tx-HR4Txg9pJ8PG0LKF5iaprP5der8ojt8XQuzNYinVYzOt9-ZBOXyIVr1W42o3C0K-tkHwcR-QBY2rHhQdbuYA2keYLimqw2JW_wma1QmdI0uN7rmNbA=s0-d)
![](https://lh3.googleusercontent.com/blogger_img_proxy/AEn0k_uJqkqTn3b7rr54VPzl3UazbiF8GGvPd5udYQaKXCnTZ4mBhqgRm11KAmuIh4E-I_qSkMUfc00ccZkdNTtMW7SXmIHYC3W7C3OMqf6uTEirYN8KdDK612ZiwoJNPYl6WQ8vgQ=s0-d)
![](https://lh3.googleusercontent.com/blogger_img_proxy/AEn0k_tRXEeTOvQ2KGJZ3ESBuJhZyUW8QG6Ne6kbv4jJ8bLwyO9ND-5QnRO07EB-Zfdanp5Z0zlQbTIbIEKWJfhu-Nx8lsFOeHPxPlRklscOerTEHvAMBNMbAkCtv7JNITTLP1eQ=s0-d)
![](https://lh3.googleusercontent.com/blogger_img_proxy/AEn0k_tRYU7bGSOlq0jmlgscVPIAg3Rlzg-OiY6DcR4DkmVb9HiGyuWBcF2x7yqhjmJavhJjhCFjgVfWeNSaXNdRFzEZxykbBSApbpq8TGPbqMh68do9lclTmZmhR38eNfk7pt1HsA=s0-d)
![](https://lh3.googleusercontent.com/blogger_img_proxy/AEn0k_vz86Gq5u3TMYCj4z0m0YSwbQ3D8lcBtO9CzjMAIogKl-iod4pX6KbPWmEDi2L33ugEUJuFZRWpWPV3J8KXVFL3Wk3meGKFyPVuWjEtSA5sWtmfjlwkyFFCKBLfhE1NZJ7K=s0-d)
![](https://lh3.googleusercontent.com/blogger_img_proxy/AEn0k_uApjDnUvEvU32xwBCldt2koH8BbAMoKFXxEsCo5gRasJ1zRRz7100YFf3cAVhFLILHYR5Q1GVxYcuJbJm4UxSGt1UKf5ndLP-pxJGOmO5B6uTYFJnUijQqIdyZjn3oLyXL0Q=s0-d)
![](https://lh3.googleusercontent.com/blogger_img_proxy/AEn0k_sd9Am4dgrTCdNJbTiWitXUxBIdPGZX_i-qBCIC1L1T1xOx2ludm7qtTtTAQcolC3OR9xyFkoktDqk9Dt3-Mu7Ac_r1J2fm2srDIjk8Btv-kavrBx1gNNUv8WTpQ_68NIdxog=s0-d)
![](https://lh3.googleusercontent.com/blogger_img_proxy/AEn0k_tWGCgF9W61_NMQTOvjiBfP6R4IUhVTfMLnAVrQrUgTmyodFLcUpJxoKCp1yu-KgUI34kl5qH7cx6qwKb-9etNcYhmyYWYPCJLKcevTvbNAQm_3ZitVWNFHzaFATCtFkDJFRw=s0-d)
![](https://lh3.googleusercontent.com/blogger_img_proxy/AEn0k_tOuaZC2maXHPSaiCag0hS-eJwtkG-YXy6OYRl5oiIKAzGXqSSa_NbmrhnncDQHRJ5keqo2cmY_SaO0BXb6a8rHEtuVJ_cZ5YMbomoIn8ACSXG8nma0WaMVFYYETIJ-_SXD4g=s0-d)
![](https://lh3.googleusercontent.com/blogger_img_proxy/AEn0k_suqFJrAbVO0TRIcCb0qrQUlWxHyCZPpopykx1xDiRA-oVp-cDr278ekM4zWmiBKUPAzSoaD-qSx1W9PZ6bCxwMm0g1-aXWOC9vysjbx4rEFCD2Pp2Y-DHZ_G_blXSEMNCzvQ=s0-d)
Wearing AA dress, Steve Madden tights, Enzo Angiolini shoes, Liz Claiborne vest, vintage blouse, Holt Renfrew beret, Michael Kors watch, and gifted rings.
I had a chance to stop by the lake this morning and take some outfit photos.
I'm starting to bring out the floral again, slowly though. I just never feel right wearing too much floral during the winter.
Ps. I can't wait to dress in green for St. Patty's Day. Are you dressing up?
Labels:
outfit,
university
Using Adobe Photoshop To Add Really Subtle Details
Adobe Photoshop CS5 (or any version) can be used to make big, sweeping, sledgehammer changes to images or small, intimate, subtle changes. It's such a versatile tool. Today's image is a combination of the two. The bridge itself is an HDR image made from three exposures. The attempt was to keep it reasonably real. Then it was pushed and pulled with individual Hue/Saturation Adjustment Layers ( 1 Red, 1 Yellow, 1 Green, 2 Cyan, 1 Blue and 1 Magenta). I always find it easier to use multiple H/S Adjustment Layers rather than try to apply grades of gray to sculpt areas. My preference is to do the sculpting with either the Masks supplied with the Adjustment Layers or add a Layer Mask to the Adjustment Layer. It all depends on what the effect is supposed to be and what's to be changed. Today's image needed to have the Cyan brought up in the sky and sucked out of the bridge. You can't have it both ways on the same Adjustment Layer. Therefore you have to Mask the parts you want to work on and treat them separately. I always name the Hue/Saturation Adjustment Layers. I try to keep things simple, so I name them Red, Yellow, Green etc. When it comes to multiple Adjustment layers it goes Cyan, Cyan 2, Cyan 3, etc. It's easy enough to turn off and on the visibility of the A. L. to identify which one is being worked. The Masks are another giant clue. In today's image it's easy to see the outline of the bridge in one Mask and the sky in another. It does get a little dicey when the number of one colors Adjustment Masks gets beyond three or four. To find out about the subtlest change in today's image, hit the "read more".
There's a couple bright spots in the lower left of the image. It's the sun coming through the trees, shining on leaves and water. I thought that a good way to tell the viewer that the bright spots were consciously left bright would be to add some "god beams" pointing to them. Matt Kloskowski, one of the "Photoshop Guys" over at NAPP (National Association of Photoshop Professionals) recently did a short tutorial on making a spotlight beam. Figured if it could make a spotlight beam it could probably make some "god beams". It's a very clever, fairly quick, trick involving out favorite - an Adjustment Layer. The "trick" is actually independent of the Layer.
First thing, get a Gradient Adjustment Layer (not Image/Adjustments/Gradient). Set the Style to Angle and the Gradient to Black & White (Click on the Gradient Frame to bring up the Gradient Editor). In the Gradient Editor set the Gradient Type to Noise. Switch the Color Model from RGB to HSB (Hue, Saturation, Brightness). Bring the Hue sliders to the color you're interesting in portraying. In the case of lights or "god beams" you'll want to bring both sliders (left hand and right hand) almost together over the color you like. The two adjustments you have at this point are Roughness and Randomize. The Roughness is a numerical value from 0 to 100. Play with it. Randomize is strictly a pushbutton. Repeatedly click on it until you see something you like. You can play with the Options of Add Transparency and Restrict Colors to get more variety.
Once you have something you like, Click OK. This will bring you back to the Gradient Fill dialog box. While there you can move the center point of the beam where ever you need it. To accurately move it, reduce the Opacity of the Adjustment Layer. Once you have it in place, return the Opacity to 100% (for the moment). Click OK to get you back to your image. Now play with the Blend Modes. This is one case where some of the more esoteric Blend Modes create interesting effects.
The last step is to bring the Opacity of the Layer down to create the effect you can actually use. As an added "bonus", you can repeat the effect as many times as you'd like on the same image. Just make sure you have a Layer Mask to have the effect wrap around (or whatever your objective is) your subject. You probably will want to check out Matt Kloskowski's video of how it's done on Episode 258 of Photoshop User TV.
Labels:
technique
Content Aware Move The Guy Around The Corner
Every once in a while you'll get an idea for a shot and just plain miss it. The fellow in today's image, in the shot of the motorcycle is actually standing behind the bike. It was what it is. A vacation shot of my brother-in-law. We were walking around downtown Marigot , St Maarten. One of our favorite towns in the Caribbean and one we thought we had to share with the scruffy one and his wife. The shot of him trying to look menacing was around the corner from the bike. I say "trying to look menacing" because he's actually a big old teddy bear. One of the biggest problems with the shot of the biker was where he was sitting. He was under an awning and had a decided magenta cast to his face. When I sampled his face with the Eye Dropper Tool (i - eye) in a Hue/Saturation Adjustment layer with Red selected it actually registered as Magenta. To see what I had to do to push and pull his color into some facsimile of a skin tone, hit the "read more".
Because of the heavy Magenta Color Cast, the sampled color in a Hue/Saturation Adjustment Layer had to be desaturated a lot. That almost took all the color out of his face. Therefore, the "real" Red had to be pumped back up. After several tries with a H/S Adjustment Layer it was certain that H/S AL's would end up in nothing but disaster. The trick wound up being a Color Balance Adjustment Layer. By playing with the Cyan/Red and Magenta/Green sliders a reasonable skin tone was achieved .
Cutting the biker out of the background ended up going "old school". It would seem that the Refine Edge/Refine Mask Tools would be the ideal method of extraction. This is exactly what everyone is shouting about about these tools. I could not get it to work on this image. I've had good success with them on other shot, but this one eluded me. I went back to the Calculations Dialog box (Image/Calculations) and, for the first time, the Red Channel worked best. It took care of the fine details of the hair and the internal portion of the face was just a case of painting in the Alpha Channel Mask once it got as far as it could with Levels.
The first thought was to flip the bike and have the biker form a stop on the right side of the image. Duh!!! The bike has some very obvious wording on the tank. It says "Harley Davidson" in bright, bold lettering. So, rather than flipping the bike, the biker was flipped. I made sure the lettering at the bottom of the shirt was cropped out. The bike had to be placed in the position it's in to tuck the biker behind his larger self.
The resulting Smart Object was Sharpened and a Vignette applied. During the sharpening process a Mask was used and his face was left unsharpened. Sharpening drew too much attention to the lines of the forehead.
It's just another case of pushing the image one way and pulling it another. That's often the case with specific parts of an image.
Labels:
technique
Photoshop Even Makes A Bad Winter Look Better
![](https://blogger.googleusercontent.com/img/b/R29vZ2xl/AVvXsEhOpvg7EO0GBHX294Ue4BLQ9nrKajU8uT9Q2z97I9UxuE7pC_tu3sbvmCn-Hg4YwTwll-IB3epPNV2oDlahYBMp-W59FCIKEVrr-KWS4F5WGZnOyRXP51UcG1E6zgjMSsHXb4XX8xc0-0M/s400/Deerfield-Snow.jpg)
Today's image started out in Adobe Photoshop Lightroom 3.3 as a single image. In LR3 two Virtual Copies were created (Photo/Create Virtual Copy) and Developed so they were two stops over and two stops under exposed. The three copies were set up to be combined in Photoshop Merge To HDR Pro. HDR Pro could see there were three of the same image, but didn't see any differences, making the Develop step unrequired. The dialog box came up and, basically, said "how are these images different?". It gives the options of doing something to either the F-stop, the Shutter Speed or the EV (Exposure Value). Unlike shooting three images for making an HDR composition, where using a changing Shutter Speed is important, here the choice is yours. Nothing can be done to change the Depth of Field that's already there, so changing the F-Stop value is as valid as changing the Shutter Speed. If you're familiar with how F-Stops and Shutter Speeds relate, it might be better to use the EV option. Just say you want copy #2 to be two EV over and copy #3 to be two EV under. Being sort of set in my ways, I mimicked what the camera would do in Aperture Priority Mode and changed the apparent Shutter Speeds. There's a dropdown, so it makes selecting the points pretty easy. After that PS CS5 will process the image using Merge to HDR Pro.
I wasn't interested in taking today's image to the far edge of HDR, but using HDR to give a little detail throughout the range. Red and Yellow were jacked up using Hue/Saturation Adjustment Layers and the color cast taken out of the snow using a Brightness/Contrast Adjustment Layer and clipping it to only the snow. That way the detail in the snow was maintained.
The sky looked pretty sad even for a winter's day, so a slightly better sky was put in place. Between using a Darker Color Blending Mode and the Alpha Channel Mask of the snow it popped that in. Using the Move Tool (V) the sky could be moved around to get the best look possible.
Normal finishing with a High Pass Filter (Filter/Other/High Pass) and a slight vignette using the Rectangular Marquee Tool (M) with a fairly large Feather (Shift F6) completing the processing of today's image.
Labels:
technique
Photoshop Makes Time Travel Possible - Sort Of
It's not often you get to see someone travel through time and distance. The gentleman in today's image is standing in the street in Colonial Williamsburg. If you've been to CW you may not recognize the location. That's because the location is an alleyway in Litchfield, Connecticut. Litchfield is a colonial era town in the beautiful hills of northwestern Connecticut. Several images that have appeared in these postings have been from Litchfield and the surrounding area. In fact, last Friday's post is from about two blocks away from today's. From the site of today's image you just walk up (literarily) West Street, turn right onto South Street past four or five houses and Friday's image is in the side yard of one of the stately homes that grace the wide boulevard there. Flipping back to the man in today's post, one of the nice things about Colonial Williamsburg is that the re-enactors will all stop and pose for anyone with a camera. While we were there, Thomas Jefferson, Martha Washington and other historical figures and "towns folks" obliged us as we snapped away. After returning home and visiting Litchfield again I thought it would be a great idea to have some re-enactors go up to celebrate its colonial heritage. I couldn't find a group who thought that was a good idea. So, we have a mashup of a fellow from Williamsburg "posing" in Litchfield. To find out how he got there, hit the "read more".
The first thing that needed to be done was to remove any vestiges of the 21st century. There wasn't a whole lot looking down the alley, but enough glaring items that were a dead giveaway pointing to today. Electrical and phone wire were fairly common. Wires ran in the trees over the carriage house. There was a pretty heavy piece of conduit, with a distribution box on top attached to the wall of the building on the right. There was an "Open" sign in the lower window and blinds in both windows.
The wires were removed in a combination of Adobe Photoshop Lightroom 3 and Adobe Photoshop CS5. Some wires lent themselves to being removed with the Spot Removal Tool in LR3. Others wound up being too close to critical edges to be removed without leaving unwanted artifacts, so the alley was brought into CS5 and the retouching continued there. The process of removing the wires wound up be a bit of a dance. do whatever could be done in LR3, switch over to CS5, save back to LR3, go as far as possible with another area, back to CS5, do a little work, save back to LR3 and keep bouncing back and forth.
The alleyway was completed before our "model" was imported, so the windows behind him were retouched completely before he was brought over. The upper windows had modern blinds in all the panes. One pane was defined using the Rectangular Marquee Tool (M) on a new Layer. It was filled with black (with black as the foreground color - Alt Backspace). It was made into a Smart Object (right click in the Layer box and choose Convert to Smart Object) and a Add Noise Filter applied (Filters/Noise/Add Noise). The finished pane was copied three times and moved into place using the Move Tool (V). Once one set of four panes looked good the Layers were combined (Click on the top Layer of the sequence, Shift Click on the Bottom Layer of the set and use Ctrl E to merge the layers). The resulting Layer was copied and pasted to a new Layer. Using the Move Tool (V) the set of four was moved into place over the next set of panes. The steps were repeated until all panes looked proper. The upper set in the lower sash required a Layer Mask to reduce the size to the correct dimensions.
The gentleman was brought in and an Alpha Channel created using the Quick Selection Tool (W) and right clicking on the selection to find the Save Selection panel. The edge was smoothed and feathered using the Refine Edge dialog box.
Labels:
technique
The Case For HDR Toning Over Merge To HDR Pro
![]() |
In Monet's Garden 2011 |
Okay, if you click on today's image you'll see that it's a couple steps beyond just plain HDR. The scene kind of reminded me of any of several Claude Monet paintings, so I "finished it" with a Pointillism Filter (Filters/Pixelate/Pointillize) with the minimum (3) Cell Size. I really didn't like what it did to the sky, so I popped on a Layer Mask I had already made (and used several times) to bring the sky back to a non-HDR, non-Pointillized state. If you follow this blog at all you've probably seen me say that I don't particularly like HDR'd skies. The final image (sans Pointillazation) looks just about exactly like the three shot Merge to HDR Pro version without the issues (I hate that expression, they're problems) I ran into with HDR Pro. If I wasn't fussy about the sky and could accept the sky pushed by HDR Pro there wouldn't be any problems. Then I took the shots with HDR in mind I set the camera to a five step (one stop per step)auto-bracket and fired away. Because of the scene, no tripod was used. The exposures were 1/2000, 1/1000, 1/500, 1/250, and 1/125 at F8 with a focal length of 57 mm at a 35 mm equivalent. With those spec hand holding was not a problem. I used the high, low and mid exposures to make a three shot HDR. The bench, which didn't move at all came out tack sharp. The trees on the other hand had some movement in them. With the Remove Ghosts checkbox ticked HDR Pro picked the middle exposure as the base of its selection. That was fine because I wanted to use the middle exposure to bring the sky back to a natural condition. That's when the stuff hit the fan. To find out about the trials and tribulations I ran into, hit the "read more".
I figured I was in. I used the middle exposure for the sky and HDR Pro used the same exposure to Remove Ghosts. No problem, right? Not so much. I made a Alpha Channel Mask using Calculations (Image/Calculations) to create a nice, sharp, solid black and white mask. It looked great with all the fine detail I could ask for. The trouble started when I applied the Mask to the original image which I had brought over as a Layer. I looked like it was a couple pixels off from the HDR Pro image. Using the Move Tool (V) I tried going left, right, up and down one pixel at a time. I also went up one/left one, right one/down one and any combination you can think of trying to match the Mask to the image. It was a no go.
I made a Alpha Channel Mask the opposite way and applied it to the opposite Layer. Still a no go. I tried combining the two Masks and that was a total disaster. I just couldn't find a pair that didn't look like a blurry image. I lined up individual branches, the edge of the house, the setting arrangement, the hedges, you name it and I probably looked at it. It just looked blurry.
I didn't think HDR Toning would produce as nice a feeling in the scene as doing a Merge to HDR Pro, but I had to try something. As it happened, I was able to get almost the exact same results with HDR Toning as I had with HDR Pro. My experience is that that doesn't happen too often. In fact, this is the first time I was happy with the result. From there it was a piece of cake. I Duplicated the image (Image/Duplicate) to have an exact copy to do the HDR Toning. I did make the Layer Mask before duplicating the image so I could reverse the procedure without needing to make another Mask if needed. Didn't need it. I did the HDR Toning to one copy, brought the other copy other as a Layer, popped on the Alpha Channel Mask and was in.
From there it was the typical saturating of colors (Red. Yellow, Green, Cyan, and Blue [Magenta had no effect] using Hue/Saturation Adjustment Layers. Contrast was increased using a Brightness/Contrast Adjustment Layer (I know, it's like using a sledge hammer to put in a tack). It was sharpened using a High Pass Filter (Filter/Other/High Pass) and vignetted with another Layer Mask. Between each major inflection point the entire stack was converted to a Smart Object. That permits going back to the original Background Layer, making any changes and updating the final image without needing to delete anything that was done from start to finish. A great way to use Smart Objects.
Labels:
technique
what time is it mr. wolf? time for a giveaway
EDIT: Congratulations to Laura from Artfully Artista for being the winner of my giveaway! I've emailed you!
Thanks to everyone who entered. Regular outfit posts should resume once all my end of the year papers are turned in (so much school work! oh dear!).
Thanks for reading my blog!
So I meant to do this post this weekend, but unfortunately my school work prevented me from doing so. Anyways, because I love you all so much and because I feel I need to compensate for my lack of posts, and because an ample opportunity arose, I have decided to hold a giveaway. This giveaway of a $50 voucher is hosted by CSN Stores. They have over 200 different stores available, and while most consist of things to be used for the household, the following ones have some incredible shoes and bags (one and two), seriously, one of my favourites is a Union Jack bag.
RULES:
-To enter all you have to do is comment below. Just remember to leave your email so that I can contact you.
Giveaway will close on March 9th at 11:59PM EST and I will announce the winner on March 10th.
Good luck to all!
Labels:
giveaway
Adding Real Estate With Adobe Photoshop CS5
What happens when you've taken a reasonable shot and when you put it up on the computer screen and start to pick it apart? It's not often you can say "yup, that's it. It doesn't need anything else." Today's image began life with a few flaws. The edge of the water, with people on the shore, distracted the eye, bringing the center of interest to the people rather than the boat. The boat was too close to the right edge of the image, giving the boat nowhere to go. There was a round canister tucked under the side of the boat to keep it upright. The boat was pretty much centered in the frame. Any one of these problems could be the kiss of death to an image. Two of the problems were easy to take care of. Cropping removed the ocean's edge and the tourists walking there. The canister was also easy. Make a selection of the can, pick the Patch Tool (J), and move the offending canister down the line of sand a little. That'll cover the can and blend the sand under the side of the boat. "Moving" the boat a little further down the beach wound up not being too difficult either. To find out what the simple solution was, hit the "read more".
Had I had another image of the beach, taken a little further down the beach, expanding the canvas (Image/Canvas Size) to the right and pushed and pulled (using Free Transform [Ctrl T]) another image to match up with what was already there. Oops, I didn't have that shot. I had what I had. One way I could have gotten rid of the people on the shore was to use Content Aware Fill. It's one of the stars of Adobe Photoshop CS5. There must be a hundred tutorials about the wonders of Content Aware Fill. Take out telephone poles, extra people, that branch growing out of someone's ear, all manner of things that ruin an otherwise good image. Well, in today's image I'm not interested in taking something out. I want to put something in. Namely, more sand.
Content Aware Fill has a little used cousin called Content Aware Scale. It first came in with CS4, but it wasn't given the splash of its sexier relative. One of the reasons is probably because it's a little trickier to use than CAF. If you select an entire image (Ctrl A) and go to Free Transform (Ctrl T) you can grab the right handle and pull the image to a longer adaptation of itself. The thing is the boat will get distorted elongation along with everything else. So, Free Transform (Ctrl T) is not the answer. For a general scene, where you might want to preserve the forms of people, simply using the Lasso Tool (L) to Select the folks and saving the selection (right click in the selection and choose Save Selection) would be the first step. Then Deselect (Ctrl D) the people and Select the entire image (Ctrl A). Go to Content Aware Scale (Edit/Content Aware Scale). On the Context Aware Options Bar there will be an option saying "Protect". Click the dropdown arrow on the dialog box and select the thing you want to remain as it is. If you named the selection when you saved the selection, click on the name of the thing you want to protect. If you didn't give the selection a name it'll be called Alpha 1 (or 2 or 3 or whatever Alpha Channel you're up to) and select that. Now you can grab the handle and pull the image out to fill the extended canvas. (If enlarging the image you'll have to had extended the canvas (Image/Canvas Size. If contracting the image just grab the handle and push toward the center.)
With today's image, using the Quick Selection Tool (W) to make an accurate selection of the boat will give a better result. Once the image has been altered to fit your objective you can commit the change by either clicking on the Green Checkmark or tapping the Enter Key.
Labels:
technique
Subscribe to:
Posts (Atom)