Blog Archive

can you believe it, i've never had any professional dance training! thats MINE!!


shimmery tank, Marciano. skirt, Guess. blazer, Bershka. shoes, Aldo. bag, Christiana.

pad thai above and calamari below

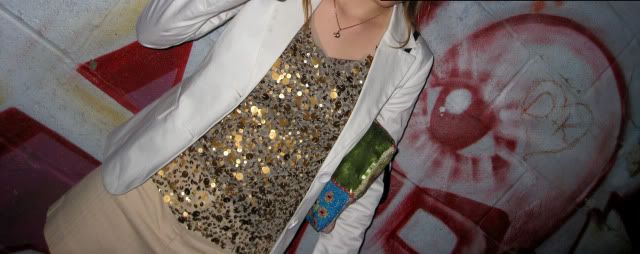
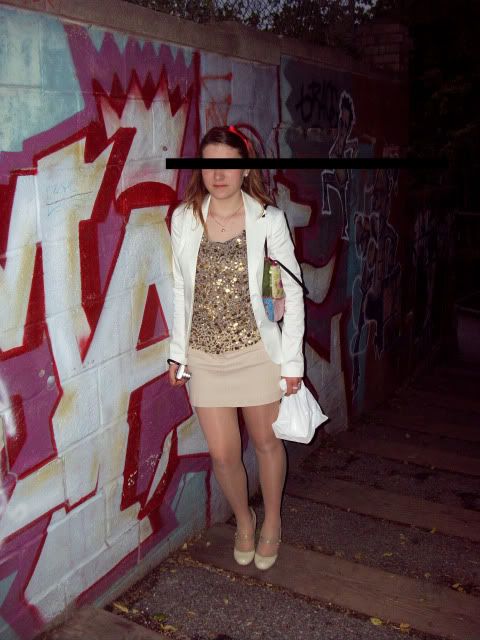
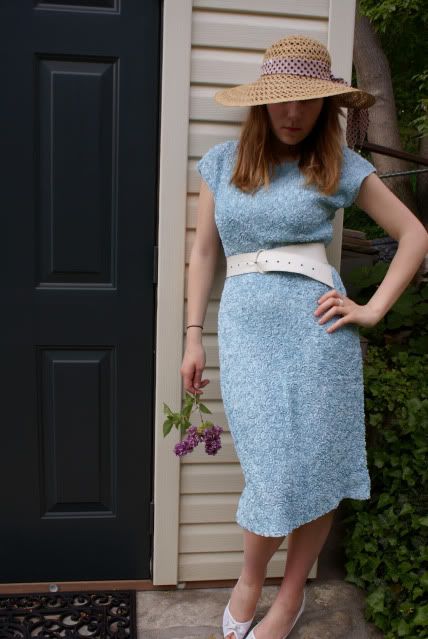
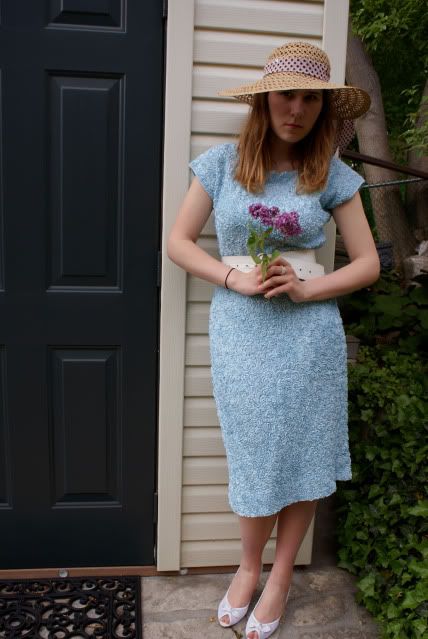
Ps. Pictures are from Friday. I have outfit pictures from Saturday when I toured my university so I will post those tomorrow. :)

Start to Finish

It's important to understand that what comes out of the camera is only the starting point of an image. On the right is the "right out of the camera shot", as taken, no frills, no finishing. It's the "undeveloped negative" of what would become the print shown on the left. There is nothing in the finished image that wasn't there in the digital "negative".

I once had the opportunity to talk to Bill Eppridge. If you're not familiar with the name, he's the photographer who took the famous picture of Bobby Kennedy lying, shot, on the floor of the hotel in California. There are many other iconic images by Bill, but that's probably his most famous (infamous). He was talking about just starting out, just out of school, trying to make a mark so his name would get out to editors of magazines. He entered a professional photographers competition. He won. The shot was of a white horse running in a field. The horse was a small part of the overall scene, but it was the "center of interest". It's a B&W print of pretty good size. Bill said he spent hours in the darkroom making print after print, dodging and burning specific sections, each time getting closer to get the image he originally saw in his minds eye.

The point is that what you originally see, straight out of the camera, isn't at an image's full potential. It's up to the photographer (or post production finisher) to bring out the information contained in the original file. The power we have today, with Photoshop, means we don't have to make "print after print" as Bill did back in the days of film and chemicals. We can try several options by using layers and groups, making "comps" either at certain points along the way or at decision points that might take the image in one direction or another. Same as Bill Eppridge dodging and burning one print after another.

We do have it easier than those before us, in that we can sit in a comfortable chair, lights on (low), people walking in and out and generally carrying on with our life rather than being imprisoned, alone, in a smelly darkroom. That doesn't mean we should pay any less attention to detail than Bill did with his competition print. If it takes more than five minutes to get the idea that an image has potential, you should probably move on. But if, after the initial exploration, you do see potential you should be willing to spend whatever time necessary to fashion the image you originally saw in your mind's eye.

meet Lola.


pants, Forever 21. shoes, Guess. tee, unknown. shirt & belt, vintage.
Lola is a 17 year old girl currently residing in Paris, France for an exchange program hosted by her highly elite boarding school situated in the heart of London. Growing up in an elite family, Lola was expected to become a lady of the house, to engage in tea parties, balls and various highly selective gatherings. Unfortunately for her parents, Lola realised that this life wasn't for her, and attempted to stray away from the constraints of her family. Sadly, being a young 16 year old at the time, Lola had very little say in her life, and to punish her for her rebellion, her parents sent her to a French boarding school in Paris to educate her in all the glory of being a lady. Lola spent her first couple of months in despair as she was stuffed in ruffled gowns, hats larger than her head, and led to events ranging from tea parties at the Ritz, to balls in houses one only reads about in fairytales. Fortunately, luck was on Lola's side, for one day while perusing the busy streets of Paris, she met a young man by the name of Logan. (Logan is an 19 year old penniless artist who does odd jobs to pay for a one room flat). Lola and Logan instantly fell in love, and from then on, Lola's time at her horrid school seemed bearable. They would wander the streets of Paris; they would sit in little coffee shops talking hour upon hour, visit poetry readings, small concerts, and sometimes they'd go dancing to clubs nestled into the cobblestone streets of Paris. Logan was the best thing that happened to Lola, he was the one person who was able to show her that she was perfect the way she was. He was the only person who believed in Lola when the rest of the world walked out on her and left her to strive on all alone.
In four weeks Lola will graduate her elite French boarding school and her parents will welcome her back to live with them on their large estate on the outskirts of London. Lola has been getting desperate, thinking of ways to escape her parents clutches and be with her one love, Logan.
Unfortunately, Lola does not know what to do, and because of this, she is currently residing under a blanket of sadness.
Note. My alter ego.

The Whole Story, Not Necessarily the Whole Picture

A friend chided me the other day saying he thought this was supposed to be a photography blog, but it looks more like an Adobe(r) Photoshop(tm) blog. Another said, in my Memorial Day tribute, that there wasn't "all" of anything in my images. To one I'd say this isn't supposed to be a "photography blog" or a "Photoshop blog", it's a personal blog that I invite anyone to visit and discuss. To the second friend I'd explain that I try to tell a "whole story", not necessarily show a "whole picture" of anything.

As a story teller using photography as a medium to tell the story I believe the feeling presented by the image is the thing. The Memorial Day image is a composite of several different shots taken at different times in different places. Today's image is one shot with, basically, the same components as the "made" shot from Monday. We have a flag, "enough" of a person and something tying the story together. Rather than a set of solo shots used to make one image, here we have Depth of Field used to create separation between the foreground, the central focus and the background. It achieves the same story telling device. The flag (in the lower left) is totally out of focus, but recognizable. The cannon in back is also out of focus. Together they explain who the person in the shot is. Another device is the (in camera) cropping of the fellow. If you're going to cut off a body part, cut deep. If you just nick the top of the head or cut someone off at the knees it's pretty obvious you made a mistake. If you crop like today's image just about anyone will be able to see that it was an "artistic" decision. As an "aside", if the shot took in any more of the area it would have had a couple hundred people standing around in twenty first century clothes.

Is today's image saleable or something that would win awards? No for a couple of reasons. Primary is that I don't know who the person is and have no way to get a model release, so, no making money off it. Although it wouldn't win any awards, it and a hundred other images from the day would make a good segment of a show when combined with some music and a voice over. The state park where the shot was taken might want to use a couple of minute show to let people know what happened on this spot many years ago.

Hello Intel People

This will be the first posting without a picture to accompany it. I'd just like to say hello to the Intel folks checking out the blog. In the past couple of weeks (since I put the info out that I have a blog) I've had 16 Intel individuals look at the site a total of 22 times. I can narrow it down to those coming through Oregon and those reaching the blog from Folsom. If you're not aware, all Intel internet traffic seems to be going through one of those two portals.

If you're getting a kick out of the blog, feel free to visit often. Leave a comment (thanks Lenny) so I'll get an idea of what you think of it. I'd be happy to stay in touch and get any critiques (constructive confrontation) you might want to give.

Just in case you're wondering, there is undoubtedly a "cookie" on your computer letting me know that you're a returning visitor.

"A Grateful Nation"

Happy Memorial Day. Today we have a composite image that's from a of couple years ago. I was thinking about 9-11 and asked a friend to pose for a couple of shots. In small town's across the country fire fighting is done by volunteers. John is a volunteer. I had John stand on a bridge over a fairly still pond. The distance between the landing of the bridge and the water was just a few feet. The concept was John standing on the bridge dressed in street clothes and his reflection in his fire fighting gear. Even the two feet of disconnect wound up being too much. Just before we left the area I asked John to put his hat on a rock wall and I took a few shots.

With the original idea a bust I turned to his hat. The accompanying image is a composite of three shots. Obviously John's hat is from the arranged shoot. The flag was flying in the parking lot of a shopping mall and the clouds came from a drive through the Catskills in New York. It's a pretty straight job of putting three images together, except for the visor of the fire helmet. The visor is made of clear plastic. If I had left it, to block the flag, the shot would have had a weird "piece of something" in the lower quarter. The visor would not have been apparent as a part of the gear. The visor is actually a fourth layer with the opacity reduced. The visor is still clearly visible and the flag can be seen behind. Attention to detail is important when the final image is a composite.

The image has resonated where it's been shown and has won several awards. The title, "A Grateful Nation" is a tribute to all who serve our great nation.

it makes you feel happy like an old time movie


dress, vintage. shoes, Guess. hat, vintage. belt, vintage.

I've had a couple of really good days lately, but I won't tell you why. It's a secret. Shhh.
Actually, it was one really good day that just made every other day better. I cannot even explain why it was good. Sometimes there are just those days where everything seems to go your way and even the smallest thing can be seen as a magical.
The more the weather warms up, the more I'm starting to feel anxious about summer approaching. I still have no job, which means no money for university or anything really for that matter. So I must find myself a job. Yet, my good day this week has even made me feel better about by joblessness.

I've noticed that some bloggers have started creating alter ego's and I've always had my own little alter ego, but I've never really went into depth about her, so I'm contemplating if I should develop her and introduce her to you all. Well, that's something you'll all have to keep reading my blog for. :)

Ps. Hope you're all enjoying the bigger pictures. I finally realised that bigger pictures are better, and I've started using my photobucket account.

Do you believe in magic?

A Very Simple in Camera Technique

The image that goes along with this post is a straight shot. (It'll be used as a component of a composite image one of these days.) The branch of the tree wasn't removed from a background to isolate it. The shot was taken along the Blue Ridge Parkway, at a roadside turnout. The turnout was right on the top of a ridgeline with fairly steep valleys on either side. Cloud cover was low enough to be hugging the ridge. The wind that day was coming from the east, where the lower clouds were. You could actually see the clouds race up the hillside and crest over the ridge at a pretty good clip. This branch was on a tree on the east side.

That's the setup. Here's how the image was taken to get the detail and color in the branch. One thing to keep in mind is that cameras, like computers, are dumb as a stump. Either will only react to what you "tell" them. If the exposure was left zeroed out as the meter "read" the scene it would have come out with the cloud being grey and the branch being in silhouette. The meter would have been fooled, wanting to average out the scene to a neutral grey. With as much white as in this scene you need to use the "Exposure Value" (EV) compensation adjustment available in just about all DSLR and some higher end point and shoot cameras. If you're not familiar with this type of situation, the first thought would be to go negative with the EV because the scene is so bright. Actually, you want to go counter intuitive. The meter is trying to make the scene grey. In order to "fool" the meter (actually, to make the meter do what you want) you'll want to go to the plus side of the EV scale. In the case of the branch the EV was increased by two full F stops. What happens is the meter now reads the scene as two F stops above the neutral grey it wants and exposes the scene properly.

The same adjustments need to be made if the scene were 90% dark. The meter still would want to render the overall scene as a neutral grey. To get the rich blacks you'd look for in a night scene you would go the opposite way and take the EV down a couple of F stops to get a correct exposure.

Today's cameras have amazing meters in them. On a nice day (sunny or not) the meter will do an accurate job of setting the proper exposure. You can have the camera on AUTO (don't do it), or P (does that mean professional?? I think not.), or Shutter Priority (know if you looking to freeze motion or show motion), or Aperture Priority (know what sort of Depth of Field you're interested in) and get a decent photograph. When you're faced with something on the fringe is when you have to do the thinking and just let the cameras meter do the mathematics.

Matching Composited Shadows

One "gothca" that's often seen in outdoor pictures that are composited is a mismatch of shadow directions. By paying attention to details, such as the shadows, a merged image can be made to be believable. It doesn't take much to figure out, based on the subject of this post, that the picture here is a result of compositing. If you guessed that the truck was put in over the image of the barn you'd only be half way home. The grass in front of the bumper was also added.

Take a look at the shadow cast by the eave of the barn. It's fairly easy to see the sunlight coming in from high left. Look at the shadow cast by the headlight of the truck on the fender. Again, high left. If you're really into nitpicking you'll see a very slight discrepancy between the angles of the shadows. The light on the truck comes from a little bit more toward the front compared to the light on the barn.

The barn is in Sherman Connecticut, the truck was in an antique restorer's parking lot in Arundle, Maine. The tall grass in the foreground is from almost anywhere. It's a good idea to take shots of ordinary things that can serve as components of a final image. To get the grass to appear to be in front of the bumper a simple mask was used, A very small brush, making random upward strokes from bottom to top, was used to create the overlaying grass.

One thing to remember, as you play with compositing multiple images, is it has to look real to be convincing. Mismatched shadows have tripped up more than one final image.

why is the queen standing without a king?


jacket, vintage. shorts, Bebe. shirt, unknown. shoes, Aldo. tights, unknown. 

That jacket is honestly the most amazing thing I have ever had in my possession. Not only does it have the most perfect shape, it has these amazing gold buttons, and it's made out of linen, so it can be worn all year round; during winter, under a coat. I am honestly in love. There aren't words to describe just how amazing it is.

I know people talk about how if you wait and keep believing for something that you really want to happen, it'll eventually happen or all that notion about what's meant to be, will be. All I have to say is, that I really doubt that. Sometimes it feels like I spend my life wishing for that perfect something to happen and it never does. So now I have exactly 3 weeks to make "meant to be" happen, and waiting around is not exactly an option. Oh why can't my life just be like an episode of Gossip Girl, at least then I could be miserable but with expensive clothes.

Everything Old is New Again

Thirty five years ago, the image with this post would have been a sign of a photographer who likes to add "something" to a slide to make it just a little different. Today, the first thing someone would say is "that's obviously Photoshopped". It was a little trickier back in the film/slide days. It involved buying a very specialized type of film called Kodalith. A slide would be sandwiched with the unexposed Kodalith film, then exposed under an enlarger light and developed. Once dry, the Kodalith image would again be sandwiched with the original and put into a slide mount. It was thought to be "oh so artsy". "Motif #1" shown in a new and different way. The reason for the Kodalith was typically to salvage a slide with some blown out areas. The exposure on the building is fine, the rock wharf looks good, but the sky and the water had, basically, no detail.

Today, a similar effect can be done in less than thirty seconds. The image of "Motif #1" was brought up in Photoshop. Holding the ALT key and double clicking in the layer representation made the "Background" into "Layer 0". Holding the CTRL key and clicking on the new layer icon produces a new layer (layer 1) under the original. Press the "D" key to set the foreground and background color to their black and white defaults. Holding the ALT key, press the Backspace key to fill "layer 1" with Black. Select layer "0" (the original image) and double click in its layer stripe. Toward the bottom of the dialog box will be the "Blend If" sliders. The top slider says "This layer". Move the white (right side) slider to the left to bring the black up through the blown out sky. If necessary, hold the ALT key and "split" the slider by clicking and dragging the left hand side of the slider pointer. Adjust until you get the desired effect. It actually took you longer to read this posting than it'll take you to make a pseudo "Kodalith".

And you've got a smile that could light up this whole town


tee, Forever 21. shorts, dad's old shorts. shoes, vintage Keds. jewelry, assorted.

These were taken yesterday, but I didn't have time to post them. :(

Anyways, what a hectic school week, although it has ended on a relatively good note, hence, I am actually pretty happy. Only a month of highschool left, and although it is nearing an end, it feels like new doors are opening. I have decided to go into law instead of fashion. Although I of course love fashion and always will, I figured that my future rested in a different direction. Fashion is going to be my hobby.

Furthermore, high school ending is making me realise that now is the time to take chances, make mistakes and lose all fears. 

"Never let the fear of striking out keep you from playing the game."
-A Cinderella Story

How to Get Saturated Colors in the Dry Darkroom

In the wet darkroom, to adjust colors to get maximum saturation, there are (were) either sets of filters or a set a dials to adjust to get the color you were looking for. In today's dry darkroom we have the same ability to individually adjust colors to get the most, least , best or artistic saturation we're looking for. The image accompanying this post has some serious saturation. If we try to get the saturation in one shot we'll have to compromise. By breaking the colors down we can control what's going on in the computer.

What we're going to do is use (strangely enough) Hue/Saturation adjustment layers. Note that the previous sentence says "layers". When the Hue/Saturation adjustment layer is first opened (in Photoshop) it's set to "Master". Forget about "Master". The drop down gives you access to the individual color pallet. Red, Yellow, Green, Cyan, Blue and Magenta. You'll want to create an separate adjustment layer for each color. There's a reason for doing it this way. Adjustment layer one should be the red and it's reasonably important to label it as such, just to be able to keep track of which layer is what. The reason for the half dozen individual Adj. layers is because you get a layer mask with each one.

Determine what area of the photo is the most important for the color you're working on. Slide the Saturation slider to 100%. Don't mess with the Hue or Lightness sliders. Make sure the numeric value is 100%. Whatever color you're working with at the time probably looking about neon at 100%. Highlight the value (the +100). Hold down the Shift Key and tap the down arrow on your keyboard. This will reduce the saturation value down in 10 point increments (going down one point at a time gives too little variation to notice from point to point). When you get the "important area" to where you like it, stop. If other areas of the picture are still too brightly colored, use the Adjustment Layer's built-in mask and paint out the too bright area. Repeat this for each color. You'll end up with masks for each color.

Other things you can do is reduce the "blackness" of your brush to moderate the level of increased color you're applying to specific areas. Also, nothing says you can't have multiple Adjustment Layers for the same color and work specific areas of the image. Once you've got as many Adjustment Layers as you need, highlight all the Hue/Saturation layers and hit CTRL G (on a Windows machine). This will group the highlighted layers into a group and keep the number of layers visible from getting out of hand. Give it a try. I think you'll get a kick out of the amount of control you have over the saturation of the colors in your photo.

When is a Picture Not a Photograph?

Okay, this shouldn't be too hard. Paintings can be pictures and they're certainly not photographs. The image that goes along with this post isn't a painting, drawing or sketch and wasn't taken using a camera. At least not one we typically think of as being a camera. It's a scanograph. It was "taken" using a scanner. It's easy enough to do. A scanner has a huge lens, short Depth of Field, and uses long exposures.

The image is made up of three scans, the flower, the fern (?) and the branch of buds. The three are then composited to create the composition. You really don't have to worry about crushing the flower because you can leave the top of the scanner off (or open). Due to the laws of physics we have the inverse square law about how light acts. (The amount of light that falls on a subject is inversely proportional to the square of the distance between the source and the subject.)

The source (light) is the lamp that transverses the scanner. The subject (the flower in this case) is sitting on the glass plate of the scanner, about one inch from the source. Therefore, with your scanner sitting on a table, or desk of almost any height, the amount of light hitting, even a white ceiling, is so ridiculously small as to eliminated. The white ceiling is rendered black.

The exposure is pretty much fixed. It's the amount of time it takes the lamp to traverse the scanner. Every portion of the subject will get the same illumination. Shadows, such as on the flower, come from the position of the light compared to the pedals of the flower. It's an interesting style of "photography" that's well worth exploring.

i had the best days with you

Delayed mother's day post...sorry everybody.

I love my mom, she's an amazing woman, certainly someone whom I look up to everyday. She's has done a great job of bringing me up and I can only hope that one day I will be as good of a mother as she is.  

Sometimes looking back on  my 17 and a half years I get really sad for I've spent so much time trying to be independent and grow up, and all those times that I could of spent with my mom are gone.

Sometimes, all a girl needs is her mom.

You were there when I took my first steps, 
And went unsteadily across the floor. 
You pushed and prodded: encouraged and guided, 
Until my steps took me out the door... 
You worry now "Is she ok?" 
Is there more you could have done? 
As I walk the paths of my unknown 
You wonder "Where has my child gone?" 
Where I am is where you have led me, 
With your special love you showed me a way, 
To believe in myself and the decisions I make. 
Taking on the challenge of life day-to-day. 
And where I go you can be sure, 
In spirit you shall never be alone. 
For where you are is what matters most to me,
Because to me that will always be home...
    -Author Unknown (I tweaked this a bit)

Not Always What it Appears

Sometimes things "look" okay, but, if studied, have flaws. I needed an image of a simple machine. There are categories of "simple machines" such as a lever, an inclined plane, a wedge and a screw (or helix). The simple machine shown here is an example of a screw.

The "machine" is simple, but the image is a bit more complex, and flawed. The proper name of the tool shown is a Stilson wrench. A picture of a single wrench would probably been pretty boring. Unfortunately, I didn't have multiple wrenches. Even if I did, having two that were identical was, most likely, not going to happen.
The answer would be to composite one image to look like two tools. If you know what you're doing this shouldn't be a problem. Only problem was, at the time, I didn't know what I was doing. This image goes back to the first year I was using Photoshop in a serious manner. The drop shadow between the wrenches? Today, piece of cake. A layer style. Then, a copy of the wrench, converted to B&W and colored black. It's a third layer, between the two layers of the wrenches. It worked, but compared to the techniques I know today, pretty wacked.

What I'm trying to get to is the fact that the learning curve for Photoshop is extremely steep, and methods of accomplishing a look or effect evolve as we (all of us) become more proficient. No one should be discouraged by what they see others doing. We need to learn and grow. The greatest impetus for learning is charging someone for the work we do. If it takes four times longer than the next person to finish a job, that doesn't mean we can charge four times as much. The work is worth a finite amount and your skill determines what you are paid per hour. If it's a $100.00 job and it takes 10 minutes to do, it's reasonable money. If that job takes 4 hours to do, either improve your skills or look for a new line of work.

BTW: The shot of the wrenches is impossible. The knurled rings intersect each other. Two things cannot occupy the same space at the same time.

so we just sit on a bench or stare at our shoes


Nothing to do or say. An emotionless day...I'm lying. 

I wish I could freeze time, just stop it for a couple hours, days, weeks or maybe even years.

i ain't no queen of hearts, I go through stages
I fall in love then complicate it
yeah, you know the feeling
without much hope just blind ambition
pretending that there's nothing missing
I always kept believing that...
more, I thought if I had more I wouldn't get so bored
but everything just left me empty
love walking in and out of my door
wasn't good enough no more
when I don't trust myself life really sucks and...


What's Good For Me - Lucy Woodward

epitome of my life at the moment

i fall in love and complicate things

Sorry for my lack of update lately, I have so much school work to get through, it's hard to keep up with the blog. It's either blog or homework, and since I want to keep my marks up, I choose homework, although I wish I could be choosing blog. Sorry for the rambling. So these pictures are from yesterday, today's picture (yes only one) will be up tomorrow. I went shopping today with my best friend in order to relax from all the school work. Unfortunately, being on a budget I only bought an oversized tee from Forever 21 for $9. I'm only buying staples right now, things that I know I'll wear over and over again.

Anyways, yesterday was a really nice day, and since I do love my apple tree, I thought it would be nice to do a little photoshoot, although I so tired while taking the pictures they didn't turn out quite as well as I hoped they would. Hope you all still enjoy them.

. 

The one thing I love more than Magnolias or Cherry Blossoms is apple tree's, especially when they're in bloom. My tree isn't in full bloom yet, but I'm predicting it will be over the next couple of days.
I managed to get a good picture of a bird who lived in our evergreen tree the last couple weeks. She had two little birdies that are utterly adorable. Unfortunately, they flew away, and I haven't seen them for the last couple of days.

I hope you're all enjoying spring. As of today there are only 24 days of classes left, + 4 days of exams, and I'm done high school. Counting weekends, and exams, till my actual graduation day there are 45 days. I'm actually kind of getting sad...kind of.

Reminder: tomorrow is mother's day. :)

Simple Memories

Almost everyone takes pictures while on vacation. People say they're trying to save memories. In the days of film photography the resulting photos would end up in a drawer, a shoe box or, if the person was very organized, an album. Only problem with albums is that they end up in a drawer, a shoebox, ... In today's digital era the "shoebox" is a harddrive, a CD-ROM or DVD. Basically, nothing has changed. The images are looked at right after they're shot and then go into a black hole, almost never to be seen again.

Let's face it, vacation pictures are typically recordings of events in our lives, not showroom class photography. If you cull through the vacation's pictures you may come out with a couple that capture the essence of the places visited. Such is the case of the shots shown with this post. All taken on Bear Skin Neck in Rockport, MA. None would be able to stand on it's own to give the feeling of the time spent on the Neck between rain drops. But, together they give a sense of the things to be found in a tourist area without appearing to be the typical "tourist shots".

The bottom (the anchor) sets the tone, identifying place. The other three shots are little tiny "pieces" of Bear Skin Neck on the day we were there. This type of print, framed or made into a calendar or just tacked up on a corkboard, can be a frequent peek at a very special weekend spent away from home and studio. It also serves as a reminder that it's the small things that matter. If you have a larger format printer, print large. If you don't have a printer capable of larger than 8.5 x 11, take a look at Costco or other discount photo outlets. A 12 x 18, at Costco, is less than $3.00.


The Only Place to Shoot Flowers

Okay, not the "only place" but probably the ideal place to shoot flowers is in the studio. It just eliminates so many of the distractions and problems of shooting flowers in the field. There's a lot of things that can be done in studio that will give the look of being shot in the wide open spaces.

Have you ever seen the shots of the underside of a flower with the blue sky just as pretty as, well..., a picture? Where do you figure the photographer was? In a hole? Go to the florist, pick through a hundred flowers, get the one that's perfect and bring it home. That blue sky you see is probably a piece of kid's construction paper. Control is the name of the game when shooting flowers. In the field you could hardly call it "still life". Even on the calmest days you will most likely have some breeze blowing ever so gently. In the studio you can lock that sucker down to the point where it wouldn't move if you had a high CFM blower going across the stage. In order to get decent DOF you'll need a small F-Stop, which means a slow shutter speed.

The shot accompanying this post was shot using daylight corrected CFLs through a softbox. The shutter speed was about 1.3 seconds. The background appears to have "something" going on , perhaps additional flowers. Actually, I was trying to kick a little light up under the flower to produce a more translucent quality. I used the gold surface of a 5 in 1 reflector and wound up getting the moving reflector in the shot. My first reaction was "you dummy", but once viewed on a monitor I saw the possibilities in the error. Rather than being a detriment to the image, it added depth.

One of the best things about shooting in the studio is you have all the time in the world. You don't have be worried about the sun getting to high in the sky. If you want a sunrise quality to the light, knock yourself out. Just past sunset, go for it. You're in control, and being "in control" of the light is a key to interesting photography, in the studio or in the field.

cause right now you're the only thing that's making any sense to me


mini dress, vintage. skirt, Head. kitten heels, The Bay. belt, vintage. jewelry, mix of gifts/vintage.

I've been going through piles of homework each day, which is becoming harder every day due to the consistently beautiful weather we're having and my lack of sleep. I really must be suffering from all the  symptoms of spring fever. I just cannot get enough of the sun peaking out from under the clouds, the flowers and trees blooming, the beautiful carpets of glass decking open spaces. I feel like throwing away all my school books and simply enjoying life, yet unfortunately, I must suffer through a month and three weeks until that glorious period of freedom. Then come September I will begin four grueling years of more school, but I'm looking forward to those years. :)

I miss my little quote of the day things, so here's one for today:
 
" Never frown when you are sad, you never know who is falling in love with your smile."

Ps. Today is 1 month till prom, so that means only 1 month till you'll all see my prom dress. :D

Some flowers from my garden. No idea what their called. If anyone knows, please tell me.